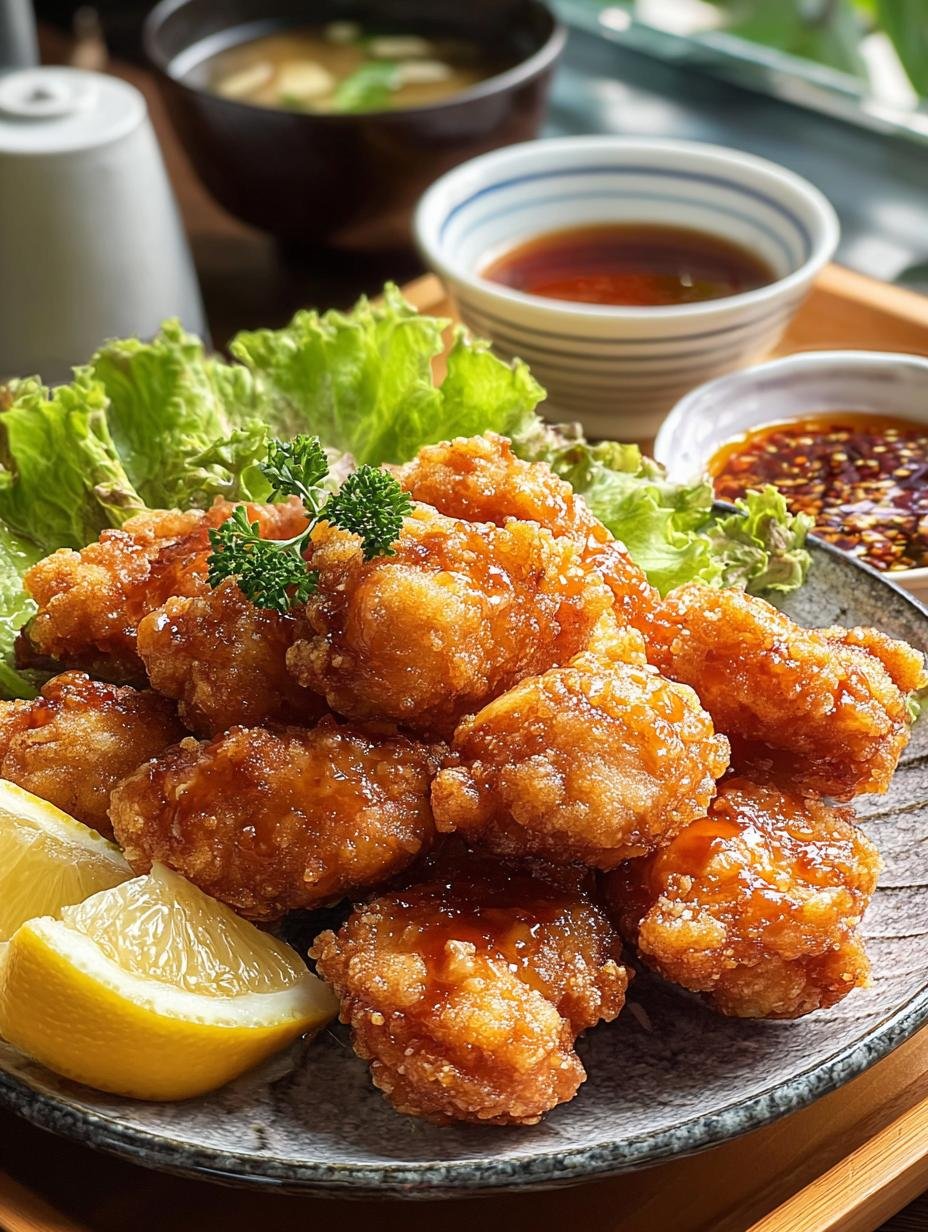
Crispy Karaage Japanese Fried is a dish that captivates with its delightful crunch and juicy, marinated chicken. This iconic Japanese fried chicken brings a wave of flavor that is both satisfying and addictive. Every bite provides a symphony of textures, from the crispy exterior to the tender meat inside. Whether enjoyed at an izakaya or made at home, **crispy karaage** is sure to impress your taste buds. Let’s dive into this mouthwatering recipe!
Why You’ll Love This Crispy Karaage Japanese Fried
This dish is not just about taste; it’s an experience! Here are some reasons why you’ll adore this Crispy Karaage Japanese Fried:
- Quick and easy to prepare, perfect for weeknight dinners.
- Juicy chicken marinated for an explosion of flavor.
- Lightly coated for that perfect crunch.
- Versatile; serves as an appetizer or main dish.
- Can be paired with various dipping sauces for added flavor.
- Perfect for meal prep and easy to reheat.
- Gluten-free, making it suitable for various diets.
- Authentic Japanese flavors that transport you to Japan.
Ingredients for Crispy Karaage Japanese Fried
Gather these items:
- 1 pound boneless chicken thighs
- 3 tablespoons low-sodium soy sauce
- 2 tablespoons sake (or white wine)
- 3 cloves garlic, minced
- 1 inch fresh ginger, grated
- 1/2 cup potato starch or cornstarch
- Oil for frying
How to Make Crispy Karaage Japanese Fried Step-by-Step
- Step 1: Cut chicken thighs into bite-sized pieces and place in a bowl.
- Step 2: Add soy sauce, sake, garlic, and ginger; mix well and marinate for at least 30 minutes.
- Step 3: In another bowl, add potato starch or cornstarch for coating.
- Step 4: Heat two inches of oil in a deep pan to 350°F (175°C).
- Step 5: Shake off excess marinade from the chicken and carefully fry in batches until golden brown (about 4–5 minutes per batch).
- Step 6: Drain on paper towels and let rest before serving.
Pro Tips for the Best Crispy Karaage Japanese Fried
Keep these in mind:
- Serve as an appetizer or main dish.
- Best enjoyed immediately for optimal crispiness.
- For extra crunch, consider a double frying method.
- Make sure the oil is at the right temperature to avoid greasy chicken.
- Experiment with different marinades for unique flavors.
Best Ways to Serve Crispy Karaage Japanese Fried
Here are some delicious serving suggestions:
- Serve with a side of steamed rice for a hearty meal.
- Pair it with Japanese-style dipping sauces like ponzu or tare.
- Add a salad for a refreshing balance to the richness of the chicken.
How to Store and Reheat Crispy Karaage Japanese Fried
You can store leftover **crispy karaage** in an airtight container in the refrigerator for up to three days. When reheating, place it in an oven at 350°F (175°C) for about 10-15 minutes to restore its crispiness.
Frequently Asked Questions About Crispy Karaage Japanese Fried
What’s the secret to perfect Crispy Karaage Japanese Fried?
The secret lies in marinating the chicken long enough to absorb the flavors and using potato starch for a light, crispy coating. This ensures that your Japanese Fried Chicken is both juicy and crunchy.
Can I make Crispy Karaage Japanese Fried ahead of time?
Yes, you can marinate the chicken ahead of time and store it in the refrigerator. However, it’s best to fry it fresh when you’re ready to serve for the ultimate crispiness.
How do I avoid common mistakes with Crispy Karaage Japanese Fried?
Avoid overcrowding the pan while frying, as this lowers the oil temperature and results in soggy chicken. Fry in batches to maintain the right temperature and achieve that perfect crunch.
Variations of Crispy Karaage Japanese Fried You Can Try
For a twist on the classic, consider these variations:
- Use different cuts of chicken, such as chicken breasts for a leaner option.
- Incorporate spices like paprika or cayenne for a spicier kick.
- Try a gluten-free flour blend instead of cornstarch for those with dietary restrictions.
- Experiment with different marinades, such as adding sesame oil or miso for more depth of flavor.

For more delicious recipes, check out our recipe category!

Additionally, you might enjoy spaghetti with garlic and oil or Mediterranean chickpea salad as side dishes!
PrintCrispy Karaage Japanese Fried: 7 Secrets to Perfection

Karaage, the iconic Japanese fried chicken, delivers an irresistible crunch paired with juicy, marinated chicken.
- Prep Time: 30 minutes
- Cook Time: 20 minutes
- Total Time: 50 minutes
- Yield: 4 servings 1x
- Category: Main Dish
- Method: Deep frying
- Cuisine: Japanese
- Diet: Gluten Free
Ingredients
- 1 pound boneless chicken thighs
- 3 tablespoons low-sodium soy sauce
- 2 tablespoons sake (or white wine)
- 3 cloves garlic, minced
- 1 inch fresh ginger, grated
- 1/2 cup potato starch or cornstarch
- Oil for frying
Instructions
- Cut chicken thighs into bite-sized pieces and place in a bowl.
- Add soy sauce, sake, garlic, and ginger; mix well and marinate for at least 30 minutes.
- In another bowl, add potato starch or cornstarch for coating.
- Heat two inches of oil in a deep pan to 350°F (175°C).
- Shake off excess marinade from the chicken and carefully fry in batches until golden brown (about 4–5 minutes per batch).
- Drain on paper towels and let rest before serving.
Notes
- Serve as an appetizer or main dish.
- Best enjoyed immediately for optimal crispiness.
Nutrition
- Serving Size: 1 serving
- Calories: 200
- Sugar: 0g
- Sodium: 400mg
- Fat: 12g
- Saturated Fat: 3g
- Unsaturated Fat: 7g
- Trans Fat: 0g
- Carbohydrates: 10g
- Fiber: 0g
- Protein: 15g
- Cholesterol: 100mg


Leave a Reply