

Melt Your Mouth Sugar cookies have been a treasured part of my family traditions for as long as I can remember. My grandmother used to bake these for every holiday, and the sweet, buttery aroma would fill our entire house, promising pure joy. The moment you bite into one, it’s like a little cloud dissolves on your tongue – that incredible melt in your mouth texture is pure magic. They’re so tender and delicate, with just a hint of sweetness that makes you reach for another. I’ve always loved how simple they are to make, proving that the most delightful treats don’t need complicated steps. Let’s get baking and create some melt-in-your-mouth happiness!
Why You’ll Love These Melt Your Mouth Sugar Cookies
Get ready to fall in love with these incredibly tender cookies! They’re not just cookies; they’re an experience. Here’s why you’ll adore making and sharing these melt-in-your-mouth delights:
- Unbelievably Tender: They truly live up to the “melt in your mouth” name, dissolving beautifully on your tongue.
- Perfectly Sweet: The balance of sweetness is just right, making them ideal for any palate.
- Quick and Easy: This is an easy melt in your mouth recipe that comes together in no time.
- Versatile Shapes: Whether you cut them into fun shapes or roll them into simple balls, they always look charming.
- Crowd-Pleaser: Everyone adores a classic cookie, and these are guaranteed to be a hit at parties or family gatherings.
- Delicate Crumb: You’ll experience a wonderful, light texture that makes them incredibly addictive.
- Satisfies Cravings: If you’re looking for that perfect melt in your mouth texture, this recipe delivers every time.
Ingredients for the Perfect Melt in Your Mouth Cookies
Gather these simple ingredients to create cookies with that signature melt-in-your-mouth texture. We’re focusing on quality and simplicity to achieve the best results for these delightful sugar confections.
- 1 cup (2 sticks) unsalted butter, softened – Using softened butter is key for creaming and achieving that delicate crumb.
- 1 1/2 cups powdered sugar – Unlike granulated sugar, powdered sugar helps create a tender texture and makes these cookies truly melt in your mouth.
- 1 large egg – Acts as a binder for our dough.
- 1 teaspoon vanilla extract – For that classic, comforting cookie flavor.
- 2 1/2 cups all-purpose flour – The foundation of our cookie dough.
- 1 teaspoon cream of tartar – This is a secret weapon for many melt-in-your-mouth cookie recipes, helping to tenderize the dough and give it a slight tang.
- 1 teaspoon baking soda – Our leavening agent for a light texture.
- 1/4 teaspoon salt – Balances the sweetness and enhances all the flavors.
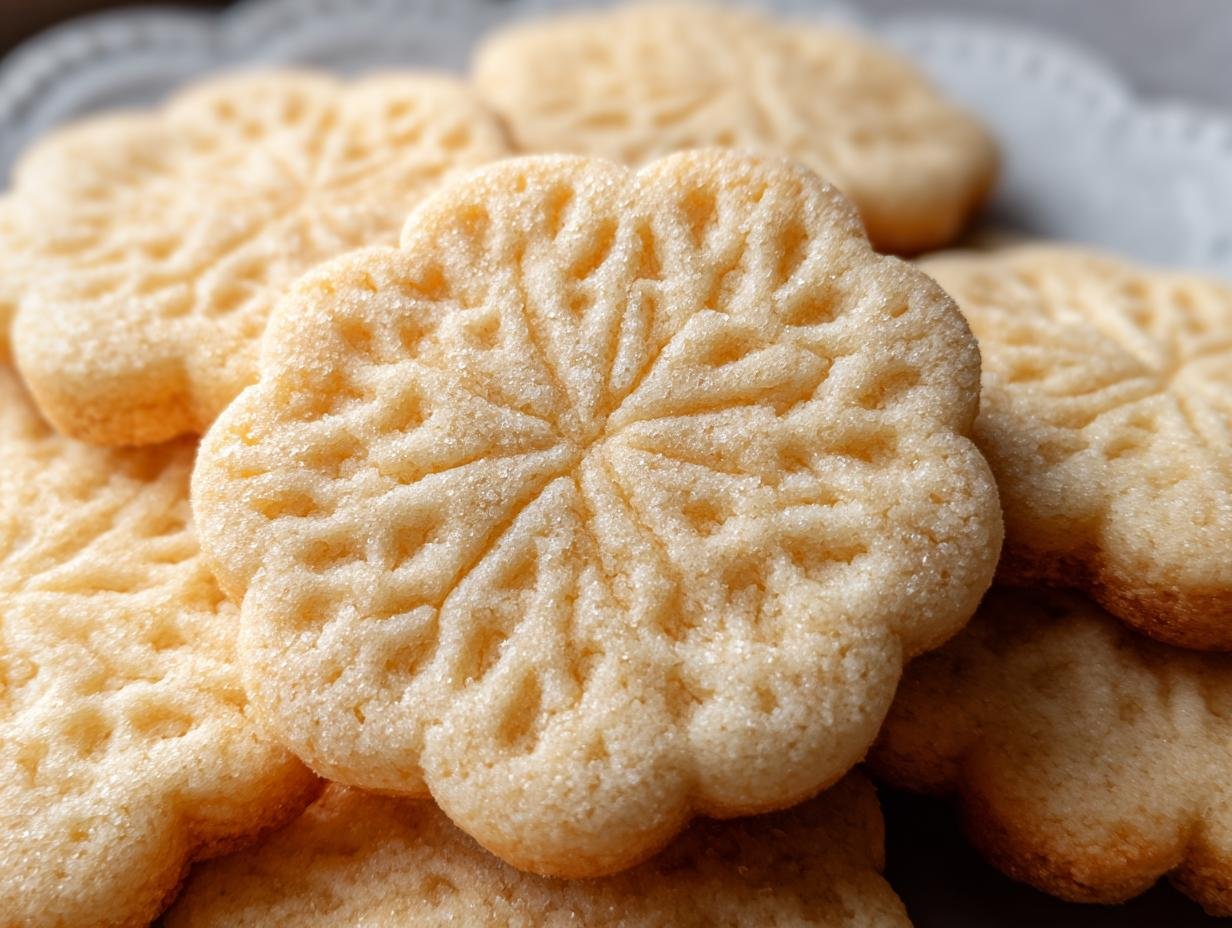
How to Make Melt Your Mouth Sugar Cookies
Follow these simple steps to create cookies that live up to their name. This recipe ensures a delightful melt in your mouth texture every time, making them a perfect addition to your baking repertoire. Let’s get started on these amazing meltable sugar treats!
Dough Preparation
Step 1: In a spacious bowl, begin by creaming together the softened butter and powdered sugar. Use an electric mixer on medium-high speed for about 2-3 minutes until the mixture becomes pale and beautifully fluffy. This is crucial for achieving that airy, melt-in-your-mouth quality. Next, beat in the egg and vanilla extract until everything is well combined and smooth.
Chilling and Shaping the Dough
Step 2: In a separate bowl, whisk together the all-purpose flour, cream of tartar, baking soda, and salt. This dry blend is essential for the cookie’s structure and tender crumb. With your mixer on low speed, gradually add these dry ingredients to the wet mixture. Mix just until you no longer see streaks of flour and a soft dough begins to form. Be careful not to over-mix; stop as soon as it comes together for the best results.
Baking and Cooling
Step 3: Cover the bowl with plastic wrap and chill the dough in the refrigerator for at least 30 minutes. This step helps the dough firm up, making it easier to handle and preventing the cookies from spreading too much while baking. While the dough chills, preheat your oven to 350°F (175°C). Prepare baking sheets by lining them with parchment paper for easy cleanup and to prevent sticking. For more baking tips, check out testing the elements.
Step 4: Once chilled, you have a couple of options for shaping. You can roll out the dough on a lightly floured surface to about 1/4-inch thickness and cut out your desired shapes using cookie cutters. Alternatively, roll tablespoon-sized portions of dough into balls and gently press them down with the bottom of a flat glass to flatten them slightly. This gives you a beautiful, consistent shape for your melt in your mouth cookies.
Step 5: Bake for 8-10 minutes, or until the edges of the cookies are just lightly golden. The centers should still look soft and slightly pale; they will continue to set as they cool. Over-baking can make them crisp rather than melt-in-your-mouth tender. Let the cookies rest on the baking sheet for about 5 minutes before carefully transferring them to a wire rack to cool completely. This cooling period is vital for developing their delicate texture.
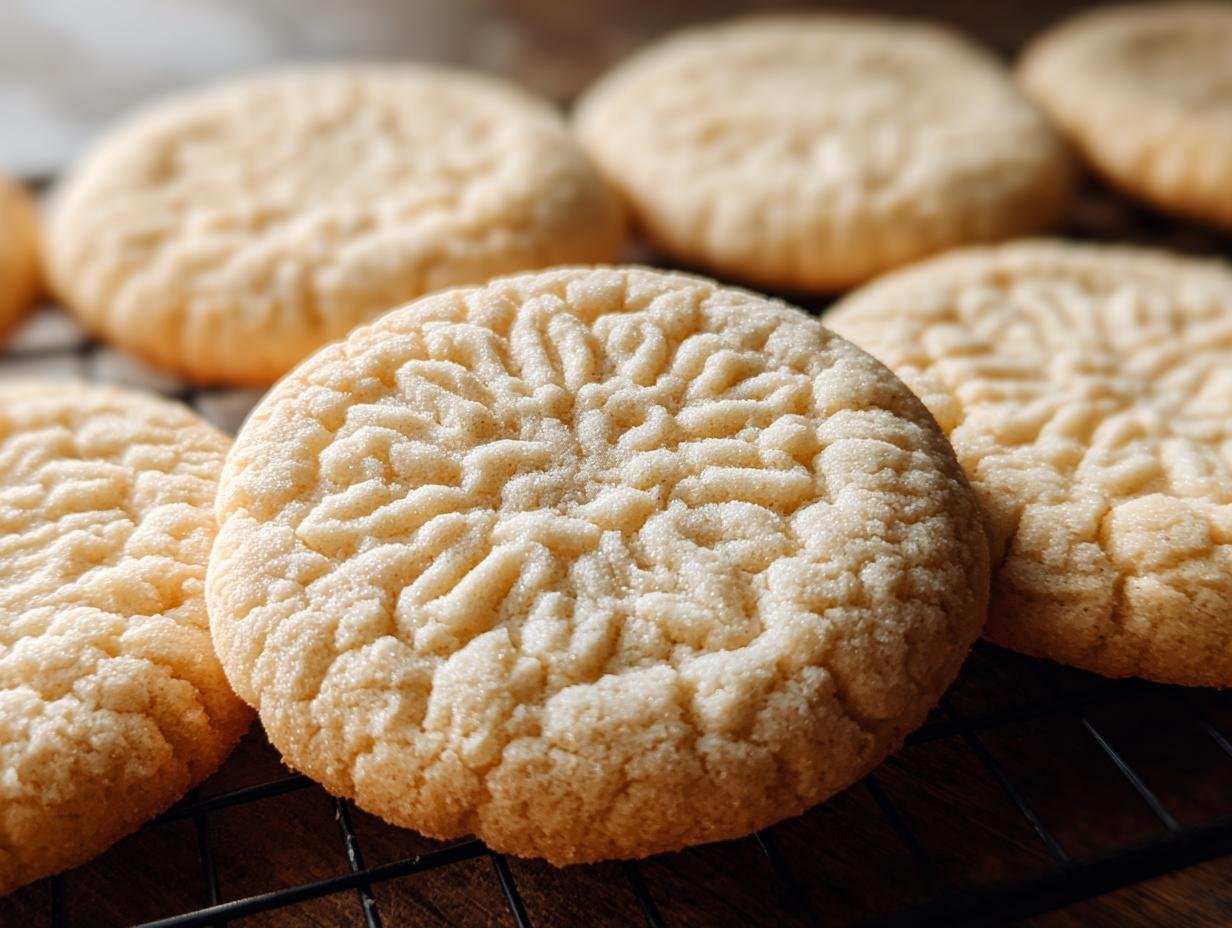
Pro Tips for the Best Melt in Your Mouth Texture
Achieving that perfect melt-in-your-mouth quality is all about a few key details. Follow these tips, and you’ll be well on your way to baking the most delightful sugar confections. These little tricks ensure your cookies are never too crisp and always wonderfully tender, living up to the promise of a true melt in your mouth recipe.
- Don’t Overmix the Dough: Overmixing develops the gluten in the flour, leading to tougher cookies. Mix just until the ingredients are combined for that desired tender crumb.
- Proper Chilling is Key: Chilling the dough not only makes it easier to handle but also helps prevent the cookies from spreading too much, preserving their delicate shape and texture.
- Watch the Baking Time Closely: These cookies bake quickly. Pull them out when the edges are just set and lightly golden; the centers should still look soft. They’ll continue to firm up as they cool.
What’s the secret to perfect melt in your mouth texture?
The secret lies in the balance of ingredients and technique. Using powdered sugar instead of granulated sugar, along with cream of tartar, tenderizes the dough beautifully. Creaming the butter and sugar until very pale and fluffy also incorporates air, contributing to that light, dissolving texture. For more on ingredient science, explore the many benefits of onions.
Can I make melt in your mouth cookies ahead of time?
Absolutely! You can prepare the dough, cover it tightly, and refrigerate it for up to 3 days. You can also freeze the unbaked dough balls for up to 3 months. Just bake them frozen, adding a couple of extra minutes to the baking time.
How do I avoid common mistakes with melt in your mouth recipes?
The most common mistake is over-mixing the dough, which results in tough cookies. Another pitfall is over-baking; always err on the side of slightly underdone for that signature melt-in-your-mouth quality. Ensure your butter is softened, not melted, for the creaming process.
Delicious Variations of Melt Your Mouth Sugar Cookies
Once you’ve mastered the basic recipe, these melt-in-your-mouth cookies are a fantastic canvas for creativity! You can transform them into a variety of delightful treats that are perfect for any occasion. These variations ensure you always have a perfect melt in your mouth recipe ready to go.
Flavor Enhancements
Elevate your cookies by adding a teaspoon of lemon or orange zest to the dough for a bright citrus note, or swap the vanilla extract for almond extract for a more sophisticated flavor profile. A pinch of cinnamon and nutmeg can also add a cozy warmth. If you enjoy baking with spices, you might like our easy cinnamon rolls.
Dietary Adaptations
For those with dietary needs, these cookies can be made gluten-free by simply swapping the all-purpose flour for a good quality 1:1 gluten-free baking blend that contains xanthan gum. This adaptation helps maintain that amazing melt in your mouth texture.
Festive Touches
Make them festive by rolling the dough balls in granulated sugar before flattening, or mix colorful sprinkles directly into the dough. You can also dip the cooled cookies in melted chocolate for an extra decadent treat, turning them into beautiful melt in your mouth confections.
Serving Suggestions for Melt in Your Mouth Desserts
These delightful melt-in-your-mouth cookies are so versatile, they pair perfectly with almost anything! For a classic tea-time experience, serve them alongside a warm cup of Earl Grey or a refreshing iced tea. They also make a wonderful accompaniment to a scoop of creamy vanilla bean ice cream for an elevated melt in your mouth dessert. Don’t hesitate to arrange them on a platter with other melt in your mouth sweets like fudge or caramels for a truly decadent dessert spread. They’re so tender, you might even find they’re the perfect bite to enjoy with a rich hot chocolate on a chilly evening! For other dessert ideas, consider our pistachio pavlova meringue cakes.
Nutrition Facts for Melt Your Mouth Sugar Cookies
Here’s a breakdown of the estimated nutritional information for one of these delightful melt in your mouth cookies. Remember, these are approximations and can vary slightly based on exact ingredient measurements and brands used, contributing to their overall melt in your mouth texture.
- Calories: 90
- Fat: 5g
- Saturated Fat: 3g
- Protein: 1g
- Carbohydrates: 11g
- Fiber: <1g
- Sugar: 6g
- Sodium: 45mg
Nutritional values are estimates and may vary based on specific ingredients used.
How to Store and Reheat Melt in Your Mouth Confections
Properly storing your freshly baked melt-in-your-mouth cookies is crucial to maintaining their signature tender crumb and delightful texture. Once they’ve cooled completely on the wire rack – this is super important, as residual heat can cause condensation and make them soggy – place them in an airtight container. For short-term storage, these melt in your mouth sweets will keep beautifully at room temperature for about 3 to 4 days. If you need to store them longer, pop that airtight container into the refrigerator. For long-term preservation of these meltable sugar treats, you can freeze the cooled cookies in a freezer-safe container or bag for up to 3 months. To reheat, simply let them thaw on the counter for about 30 minutes, or warm them gently in a low oven (around 250°F or 120°C) for a few minutes until they’re soft again.
Frequently Asked Questions About Melt in Your Mouth Candy
What makes candy melt in your mouth?
The magic behind that dreamy melt in your mouth texture comes down to a few key factors. It’s often a combination of high sugar content, specific fats like butter or cocoa butter, and careful cooking temperatures. Ingredients like powdered sugar and corn syrup, when used in recipes for melt in your mouth cookies or fudge, help create a smooth, fine crystalline structure that breaks down easily on the tongue. It’s all about achieving that delicate balance that dissolves without being sticky or overly chewy. For more on sugar crystallization, you can look into the beauty of food.
Why do some candies melt in your mouth while others don’t?
It’s all about the ingredients and how they’re processed! Candies designed to melt in your mouth typically have a higher ratio of sugar to flour or other binding agents, and often incorporate ingredients that contribute to smoothness, like butter or cream. For instance, a good melt your mouth sugar cookie recipe uses powdered sugar and cream of tartar to create a tender crumb, whereas a hard candy relies on high heat to create tightly bonded sugar crystals that don’t dissolve as readily. Understanding what makes candy melt in your mouth is the first step to mastering these treats.
Can I make melt in your mouth cookies softer?
Absolutely! If your melt in your mouth cookies are coming out a bit too firm, you can adjust a few things for your next batch. Try slightly reducing the baking time, pulling them out when the centers still look soft. You can also ensure you’re using softened butter and not over-mixing the dough, as both can lead to a tougher texture. Adding a touch more liquid, like a tablespoon of milk, can also help achieve that ultra-tender, melt in your mouth texture. These simple tweaks can make a big difference in your melt in your mouth recipe.
How can I achieve a smooth melt in your mouth fudge texture?
Achieving smooth melt in your mouth fudge requires attention to detail. Start by ensuring your sugar and butter are fully dissolved before bringing the mixture to a boil. Stirring constantly during cooking helps prevent large sugar crystals from forming, which is crucial for that smooth texture. Cooling the fudge to the right temperature before beating is also key; it allows the sugar crystals to form small, manageable sizes that give that signature melt-in-your-mouth feel. It’s a classic example of how precise technique creates the perfect melt in your mouth candy experience. For another sweet treat, try our berry crumble with fresh berries.
PrintMelt Your Mouth Sugar: 1 Easy Tender Recipe

Discover how to make melt-in-your-mouth sugar cookies with this simple vintage recipe. These tender cookies have a delicate crumb that melts the moment it hits your tongue, perfect for any occasion.
- Prep Time: 20 minutes
- Cook Time: 10 minutes
- Total Time: 1 hour 10 minutes
- Yield: Approximately 3 dozen cookies 1x
- Category: Cookies
- Method: Baking
- Cuisine: American
- Diet: Vegetarian
Ingredients
- 1 cup (2 sticks) unsalted butter, softened
- 1 1/2 cups powdered sugar
- 1 large egg
- 1 teaspoon vanilla extract
- 2 1/2 cups all-purpose flour
- 1 teaspoon cream of tartar
- 1 teaspoon baking soda
- 1/4 teaspoon salt
Instructions
- In a large bowl, cream together softened butter and powdered sugar using an electric mixer on medium-high speed for 2-3 minutes until pale and fluffy. Beat in the egg and vanilla extract until combined.
- In a separate bowl, whisk together flour, cream of tartar, baking soda, and salt.
- With the mixer on low speed, gradually add the dry ingredients to the wet ingredients. Mix just until the flour disappears and a soft dough forms. Do not over-mix.
- Cover the bowl and chill the dough in the refrigerator for at least 30 minutes.
- Preheat oven to 350°F (175°C). Line baking sheets with parchment paper.
- Roll out the dough on a lightly floured surface to about 1/4-inch thickness and cut out shapes, or roll tablespoon-sized portions into balls and gently press them down with a flat glass.
- Bake for 8-10 minutes, or until the edges are lightly golden. The centers should still look soft.
- Let cookies rest on the baking sheet for 5 minutes before transferring to a wire rack to cool completely.
Notes
- For a delightful crunch, roll dough balls in granulated sugar before baking.
- Add lemon zest for a citrus twist, almond extract for a sophisticated flavor, or sprinkles for a festive touch.
- For a cozy flavor, whisk 1 teaspoon of cinnamon and a pinch of nutmeg into the dry ingredients.
- These cookies can be made gluten-free by using a 1:1 gluten-free all-purpose flour blend that includes xanthan gum.
Nutrition
- Serving Size: 1 cookie
- Calories: 90
- Sugar: 6g
- Sodium: N/A
- Fat: 5g
- Saturated Fat: N/A
- Unsaturated Fat: N/A
- Trans Fat: N/A
- Carbohydrates: 11g
- Fiber: N/A
- Protein: 1g
- Cholesterol: N/A









Leave a Reply